I found the source of my Minimig-core problems – one was a misrouting of the SD-card’s chip select signal, and the other was interference from the Action Replay module, which isn’t usable with this version of the core anyway, so I’ve simply disabled it.
The core itself now runs very nicely on the C3 board, with the same basic feature set as the Chameleon core: On top of the normal Minimig feature set, thanks to the efforts of Tobias Gubener it supports 68020-compatible soft processor, and up to 8 meg of Fast RAM. My own tweaks to the OSD firmware added support for WinUAE-style HDFs and direct SD card access as well as some other minor tweaks.
There are plenty of further tweaks to be made and problems to solve, but after the frustrations of trying to get it working a few days ago, it’s nice to be able to play some Amiga games on it today!
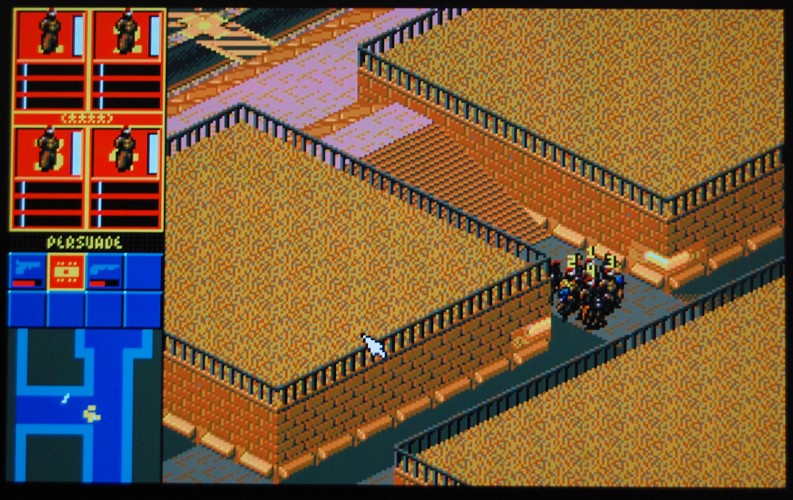
Here’s Syndicate (courtesy of WHDLoad)
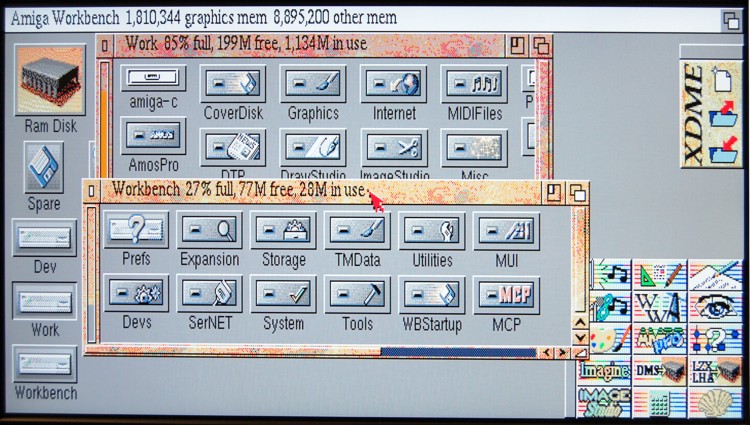
And the workbench from my old A4000, running from an SD card partition.
(The original was DblNTSC. Interesting that PAL Hi Res should look good on a widescreen monitor!)
Full source and bitstream files for the core are available for download here.


I like the name of the project…Fampiga…cool.
btw…what cyclone3 are you using? EP3C25?
Oops no DE1 project dir…are you saying that actually there is no change in the de1 project source? from since Chaos’s chameleon port?
The name “Fampiga” is something Tobiflex came up with when he first ported the Minimig to the DE1 / DE2 and C-one boards. It is of course a combination of the words “FPGA” and “Amiga”.
And yes, no DE1 project dir here, this port is only for the custom C3 board so far, though I may get it running on the Chameleon at some point, too.
The DE1’s FPGA isn’t large enough to take this version of the core directly. Chaos has done wonders to squeeze his own port into the DE1!
Yeah, that’s what I was thinking…I was thinking about going with the DE2-70 at one point, just because of that…But I think I see the C3 board that you sourced on ebay…about $120 was it…
but it is RED! is that the same one?
Yes, that’s the one. Don’t worry about the red soldermask – the description says that the shipped board will be green.
If you buy one, though, just make sure you get one with *two* SDRAM chips.
(The single SDRAM chip is large enough, at 16mb, but only 8 bits wide, so no use for the Minimig.)
Also make sure it’s the EP3C25 version, not the EP3C16 version, which isn’t large enough to hold the Minimig design.
yeah…OK..got you….
yeah the 16K LE is the same chip as the one in the MCC-216 that have…no hope in porting the new core to that…but their website still claims that an core will come out soon….as well as a new speccy core…
seems like there are some controversial issues with that company and claims that the Amiga core that they released before is illegal.
de1 sof has the same audio problem as the first test version of CHoas’s build…
Hey! I didn’t really get it until now…the latching power switch…everything…your whole fpga project is to make your own fpga amiga clone in inside that acer case…am I right? For just a hobbyist, you sure have a lot of hours into this project AMAZING! You know…I am thinking that with a bit of modification a 6-bit per gun VGA port could be added onto the DE1 GPIO 0…could use probably use your VGA AV board almost unmodified attached with a ribbon cable. That non dithered pic of the output looks fabulous.
Hehe – yup, sort of 🙂 Building my own computer “from scratch” has been a kind of dream of mine ever since I was a teenager. I wouldn’t say building the Amiga clone was the ultimate goal, though – the ultimate goal was to learn about FPGA programming, and the TG68-MiniSOC is something I’ll continue tinkering with. 🙂
As for the video board, unfortunately the DE1 GPIO placement of power pins is completely different from the C3 board I’m using, so you would need a wiring adapter – but apart from that the board should work as is on the DE1. Only problem is, there’s a 47 Ohm resistor in series with every GPIO pin on the DE1, so the resistor values would probably need adjusting accordingly.
Same, here…I have been looking at the stuff and lucid science web, was it? Actually…last year, I also saw something done with 3 AVR’s and with some propellers and I tried to make a retro 8.bit computer with a few arduinos….I got one working with with one Arduino MEGA and the tiny basic…with 8k for programming…and the tv out lib…ps2/lib…but I thought it might be cooler to use three arduino’s and use the I2c or SPI …one could be the computer another the io/keyboard stuff and one overclocked using the AVGA lib…
There have been a lot of really cool homebuilt computer projects on Hackaday recently…some awesome stuff….
Actually….a long time ago…on the net I found this site where some guy had made an Amiga like computer, 68k based…that was AWESOME…called the AMIGOS….or something…I have his schematics on my old computer back in the US at my parent’s house…I have tried to find his web site again…but it’s gone….
I was wondering…did you have an SD-to-IDE adapter in your A4000?
or does your SD card have 3 partitions a FAT32 with the KICK.ROM and then
two AMIGA partitions with your SYSTEM and WORK partitions? I was wondering how to do that….
Like using GPARTED live CD to set everything up…then from WINUAE in combination with amiga forever…copying my A1200 HD to the SDCARD parts…
The SD card has two partitions, one FAT32 for the OSD boot file, and one which is devoted to the “Amiga”. That partition is treated as a complete hard disk by the Amiga, so it starts with an RDB, and is further split into three Amiga partitions.
I prepped the card using the Minimig, then used uae on Linux to mount that partition as a hard disk, and copied the files onto it that way.
My A4000 just had a regular hard-drive, but I imaged it carefully years ago before putting the machine in storage. The machine’s now out of storage again 🙂
I was thinking that there should be a way to read the kick.rom from Flash memory…I don’t know how to do any of this yet….I was trying to port the one chip MSX to another cyclone III board…but when it got the the pin mappings I was overwhelmed…
Yeah it pays to start small with this stuff. For the C3-board Minimig project I had to convert a schematic-based toplevel from the Chameleon project to a VHDL toplevel for my board – that’s a task I wouldn’t have attempted even a couple of months ago.
I love this project , If I buy a deb kit can I pick your brains – I know zip about the fpga but plenty about the Amiga.
Mike
I’ll help where I can – unfortunately the particular C3 board I used here doesn’t seem to be available any more. It doesn’t really matter which board you use, though, as long as the FPGA is large enough. I’d say don’t get anything smaller than an EP3C25.