
Part 7 – Loading data from SD card.
In this part of the series I’m going to look at the most useful aspect of the control module – using it load data from SD card and pass it to the host core.
To make a meaningful demonstration, the host core needed to be able to do something with the received data, so I’ve pulled in the SDRAM controller and VGA framebuffer from the ZPUDemos project. What I’ve called the “host core”, the part of the project which the ZPU-based control module is supporting, is now capable of displaying a 640x480x16-bit VGA screen from SDRAM, and as such the project is now quite a bit more complicated; however, the only new file needed by the control module itself is spi.vhd which handles communication with the SD card.
So let’s take a look at the SD card communication. SD cards can operate in one of two modes; one is a proprietory system specific to SD cards which, until fairly recently was the subject of a certain amount of secrecy, while the other is a simple microcontroller-compatible SPI protocol, which is what we’ll use in the control module.
I won’t cover the protocol in detail here, but the C source files CtrlModule/Firmware/spi.[c|h] handle the actual block-level transfer of data between FPGA and SD card. They do this by writing to two new hardware registers at 0xFFFFFFD0 and 0xFFFFFFD4. The first of these controls the card select signal, and also selects between fast and slow transfer speeds (SD cards must be initialised at a slow speed, but can then be driven faster.) The second register is used to transfer data.
The actual hardware module looks like this (derived from the SPI interface from the TG68-based Minimig variants):
entity spi_interface is
	port (
		sysclk : in std_logic;
		reset : in std_logic;

		-- Host interface
		spiclk_in : in std_logic;	-- Momentary high pulse
		host_to_spi : in std_logic_vector(7 downto 0);
		spi_to_host : out std_logic_vector(7 downto 0);
		trigger : in std_logic;  -- Momentary high pulse
		busy : buffer std_logic;

		-- Hardware interface
		miso : in std_logic;
		mosi : out std_logic;
		spiclk_out : out std_logic -- 50% duty cycle
	);
end entity;

architecture rtl of spi_interface is
signal sck : std_logic;
signal sd_shift : std_logic_vector(7 downto 0);
signal shiftcnt : std_logic_vector(3 downto 0);
begin

-----------------------------------------------------------------
-- SPI-Interface
-----------------------------------------------------------------
	spiclk_out <= sck;
	busy <= (not shiftcnt(3)) or trigger; -- Or-ing in the trigger signal makes the busy signal respond immediately
   spi_to_host <= sd_shift;

	PROCESS (sysclk, reset) BEGIN

		IF reset ='0' THEN
			shiftcnt(3)<='0';
			sck <= '0';
		ELSIF rising_edge(sysclk) then
			IF trigger='1' then
				shiftcnt <= "0111";  -- shift out 8 bits, underflow will set bit 3, mapped to busy
				sd_shift <= host_to_spi(7 downto 0);
				sck <= '1';
			ELSE
				IF spiclk_in='1' and busy='1' THEN
					IF sck='1' THEN
						mosi<=sd_shift(7);
						sck <='0';
					ELSE
						sck <='1';
						sd_shift <= sd_shift(6 downto 0)&miso;
						shiftcnt <= shiftcnt-1;
					END IF;
				END IF;
			END IF;
		end if;
	END PROCESS;

end architecture;
We need to supply an spiclock_in signal for the SD card in the form of a momentary pulse. This should be no greater than 400KHz in slow mode, and somewhat faster in fast mode…
-- SPI Clock counter
signal spi_tick : unsigned(8 downto 0);
signal spiclk_in : std_logic;
signal spi_fast : std_logic;
...
-- SPI Timer
process(clk)
begin
	if rising_edge(clk) then
		spiclk_in<='0';
		spi_tick<=spi_tick+1;
		if (spi_fast='1' and spi_tick(5)='1') or spi_tick(8)='1' then
			spiclk_in<='1'; -- Momentary pulse for SPI host.
			spi_tick<='0'&X"00";
		end if;
	end if;
end process;
Then the SPI peripheral is accessed in software via the two new registers, like so:
	-- Writes:
	when X"D0" => -- SPI CS
		spi_cs<=not mem_write(0);
		spi_fast<=mem_write(8);
		mem_busy<='0';

	when X"D4" => -- SPI Data (blocking)
		spi_trigger<='1';
		host_to_spi<=mem_write(7 downto 0);
		spi_active<='1';
...
	-- Reads:
	when X"D0" => -- SPI Status
		mem_read<=(others=>'X');
		mem_read(15)<=spi_busy;
		mem_busy<='0';

	when X"D4" => -- SPI read (blocking)
		spi_active<='1';
Notice that accesses to register D0 terminate the cycle by setting mem_busy to '0', but accesses to D4 don't. Instead accesses to this register block the CPU until the request has been processed; the CPU is subsequently released, like so:
	-- SPI cycle termination
	if spi_active='1' and spi_busy='0' then
		mem_read(7 downto 0)<=spi_to_host;
		mem_read(31 downto 8)<=(others => '0');
		spi_active<='0';
		mem_busy<='0';
	end if;
Block level access to the card is only half the story, however - we need to be able to access individual files and directories in the filesystem. This is handled by CtrlModule/Firmware/minfat.c, which is a minimal FAT32 filesystem implementation, again loosely based on similar code from the Minimig project but cut down and simplified to take up as little ROM space as possible.
Again, I won't go into too much detail on using the minfat.c code - the firmware's source provides a reference; suffice it to say that loading a specific file from the SD card looks something like this:
fileTYPE file; // Declare as a global

...

if(!FindDrive()) // Initialise the SD card, find the first partition (if applicable) and find the filesystem.
	return(0);

if((opened=FileOpen(&file,filename)))
{
	int filesize=file.size;
	while(filesize>0)
	{
		if(FileRead(&file,sector_buffer))
		{
			FileNextSector(&file);
			// Do something with the data which can be found in sector_buffer...
			filesize-=512;
		}
	}
}
What the project does with the data depends very much on the underlying core. In the OneChipMSX project the underlying core uses a Z80 program to read data from an EPCS4 configuration device, and writes that data to SDRAM, so I replaced that Z80 program with a simpler version and made the control module supply the data byte-by-byte, similar to how the EPCS4 does it.
The PC-Engine core used a state machine to load data from a Flash chip, and again copied it to SDRAM, so I simply replaced the state machine with a version which received the data from the control module instead of the flash chip.
This demo simply passes the data to the Host core via a 32-bit data channel, and with req / ack handshaking. The host core writes the received data to SDRAM at the framebuffer address, so the VGA controller will display the contents of whichever file you select.
The final problem to be solved is displaying a file selector. I ended up using the existing menu infrastructure for the file selector, declaring an empty menu, like so:
static char romfilenames[13][30];

static struct menu_entry rommenu[]=
{
	{MENU_ENTRY_CALLBACK,romfilenames[0],MENU_ACTION(&selectrom)},
	{MENU_ENTRY_CALLBACK,romfilenames[1],MENU_ACTION(&selectrom)},
	{MENU_ENTRY_CALLBACK,romfilenames[2],MENU_ACTION(&selectrom)},
	{MENU_ENTRY_CALLBACK,romfilenames[3],MENU_ACTION(&selectrom)},
	{MENU_ENTRY_CALLBACK,romfilenames[4],MENU_ACTION(&selectrom)},
	{MENU_ENTRY_CALLBACK,romfilenames[5],MENU_ACTION(&selectrom)},
	{MENU_ENTRY_CALLBACK,romfilenames[6],MENU_ACTION(&selectrom)},
	{MENU_ENTRY_CALLBACK,romfilenames[7],MENU_ACTION(&selectrom)},
	{MENU_ENTRY_CALLBACK,romfilenames[8],MENU_ACTION(&selectrom)},
	{MENU_ENTRY_CALLBACK,romfilenames[9],MENU_ACTION(&selectrom)},
	{MENU_ENTRY_CALLBACK,romfilenames[10],MENU_ACTION(&selectrom)},
	{MENU_ENTRY_CALLBACK,romfilenames[11],MENU_ACTION(&selectrom)},
	{MENU_ENTRY_CALLBACK,romfilenames[12],MENU_ACTION(&selectrom)},
	{MENU_ENTRY_SUBMENU,"Back",MENU_ACTION(0)},
	{MENU_ENTRY_NULL,0,MENU_ACTION(scrollroms)}
};
While this eats up a bit more RAM in the program "ROM" than I would have liked, it does avoid the need for too much special case code, and helps keep the code size down. As a bit of an ad-hoc hack, I added to the menu code so that if the cursor keys or page up / down keys were pressed while the cursor was already at the top or bottom of the menu, a callback function will be called to redraw the menu - this allows me to handle scrolling, like so:
static void scrollroms(int row)
{
	switch(row)
	{
		case ROW_LINEUP:
			if(romindex)
				--romindex;
			break;
		case ROW_PAGEUP:
			romindex-=16;
			if(romindex<0)
				romindex=0;
			break;
		case ROW_LINEDOWN:
			++romindex;
			break;
		case ROW_PAGEDOWN:
			romindex+=16;
			break;
	}
	listroms();
	Menu_Draw();
}
The code in minfat.c has provision for reading a directory, though in the interests of simplicity and small code, it only supports reading directory entries in sequential order. Populating the file selector menu looks like this:
static void listroms()
{
	int i,j;
	j=0;
	for(i=0;(j<romindex) && (i<dir_entries);++i)
	{
		DIRENTRY *p=NextDirEntry(i);
		if(p)
			++j;
	}

	for(j=0;(j<12) && (i<dir_entries);++i)
	{
		DIRENTRY *p=NextDirEntry(i);
		if(p)
		{
			if(p->Attributes&ATTR_DIRECTORY)
			{
				rommenu[j].action=MENU_ACTION(&selectdir);
				romfilenames[j][0]=16; // Right arrow
				romfilenames[j][1]=' ';
				if(longfilename[0])
					copyname(romfilenames[j++]+2,longfilename,28);
				else
					copyname(romfilenames[j++]+2,p->Name,11);
			}
			else
			{
				rommenu[j].action=MENU_ACTION(&selectrom);
				if(longfilename[0])
					copyname(romfilenames[j++],longfilename,28);
				else
					copyname(romfilenames[j++],p->Name,11);
			}
		}
		else
			romfilenames[j][0]=0;
	}
	for(;j<12;++j)
		romfilenames[j][0]=0;
}
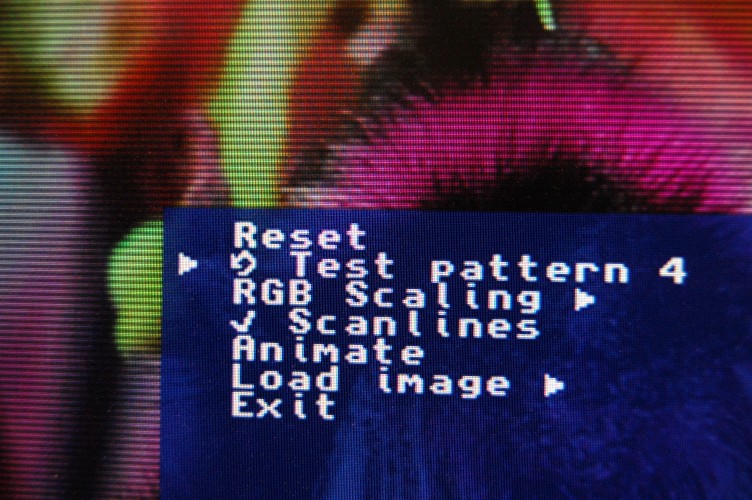
The Github repo contains full source for the demo (Tagged as Step6), and also contains four raw 640x480x16 image files which should be copied to an SD card. The demo can load and display these files, and the menu options can be used to mess with the colours.