Under attack!

This blog was offline for a while yesterday, and was running slow when it was up.  Apparently the reason was an internet-wide attack against WordPress sites, attempting to brute-force the admin passwords, and presumably litter any compromised blogs with spam.

Thankfully I used a nice secure password (Eight asterisks – no-one would *ever* guess that!) and RetroRamblings seems to have been spared any such indignity.

Experimenting with TG68

Part 11 – porting to the Turbo Chameleon 64

After porting the Minimig core to my ebay-acquired Cyclone III board, I’ve spent some time this week porting the MiniSOC project to the Turbo Chameleon 64.

Hardware-wise the TC64 is very similar to the CIII board – the FPGA is identical, and there’s the same amount of SDRAM – albeit with a slightly different layout – so porting projects from one to the other is fairly straightforward.  The only complicated part is routing certain signals through a CPLD which is used in the TC64 to multiplex some of the IOs, and as a bonus, to provide 5v tolerance.  This is taken care of in the Chameleon-specific toplevel, meaning once again that the same basic source tree can be built for DE1, the CIII board and now also the Turbo Chameleon 64. Continue reading

The Minimig core in action

I needed a bit of a break from wrestling with timing constraints and trying to figure out how to make the core stable from build to build, so figured I’d make a video of the Minimig core in action.  This is the first time I’ve used this particular camcorder, so forgive the shaky camerawork!

As Nature intended!

In my last post I mentioned removing the blue LEDs from the fascia of the case I plan to use for my FPGA project.  I have an extreme dislike of blue LEDs – or at least of the seemingly universal pervasiveness of blue LEDs.  We’ve been able to make them cheaply for, what, a decade now?  Get over it, people!  It’s not novel any more.  They’re annoyingly bright and unpleasantly piercing.  I’m tired of hiding them behind Post-it notes.

So I replaced these obnoxious blue LEDs with bog-standard red, yellow, orange and green LEDs, which worked but weren’t really bright enough to shine through the diffusing layer on the case.  (This layer’s task is presumably to make the blue LEDs vaguely bearable.  Hint: you can make them much *more* bearable by not using them in the first place.)

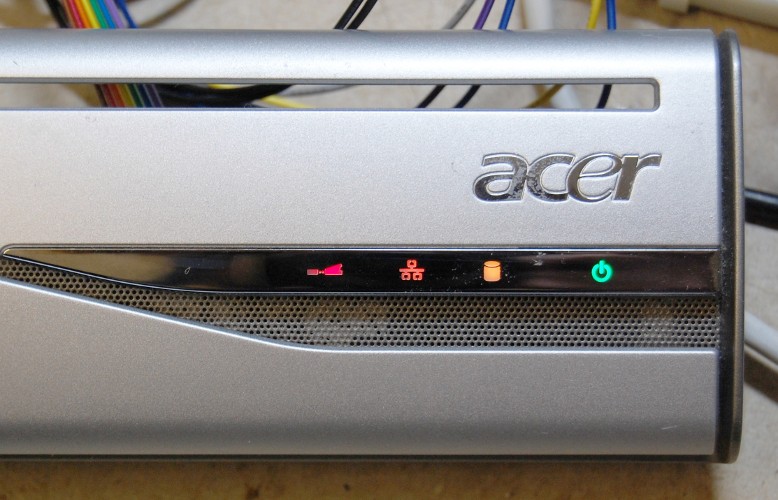
I ordered some high-brightness LEDs, somewhat skeptical about how different they’d be.  The difference is dramatic, and the LEDs are now clearly visible even in strong light:

There!  Doesn’t that look much nicer than a row of blue lights?

Experimenting with TG68

Part 8 – Timers and C code

Having successfully uploaded an S-record program over RS232 last time, I’ve since followed the helpful instructions in Christian Vogelgsang’s Chameleon Minimig repo for setting up a cross-compilation toolchain.  I’m now able to build C software for this project, which in the absence of a more imaginative name, I’m coming to think of as “MiniSOC”.

(In fact, I haven’t used newlib – and nor did Christian in the finish – instead we’ve drawn from klibc, just cherry-picking the routines needed for the task at hand.  There are also a couple of other dependencies for building GCC – gmp, mpfr and mpc, which are a stack of libraries for handling multi-precision arithmetic.)

Since I’m not familiar with the syntax used by GCC’s assembler (which is very unlike the “normal” Motorola syntax) I also used VASM to build assembly components to Elf format, then the cross-compiled objdump to create S-records from the final project.

I also used srec_cat, as before, to create .mif files from the lowest-level startup file, which ends up in an M4K.

The biggest change hardware-wise this time round is the addition of some timers.  There are now eight in total, two of which directly divide the system clock, and the other six divide the output of the first timer.  Three of those run in continuous mode, and three run as one-shot timers.

An event on any of those six timers will trigger an interrupt, and the one timer I haven’t yet mentioned will eventually be used to provide an SPI clock when I implement SD card access.

The firmware file CFirmware/out.srec contains basically the same graphics demo as previous builds, implemented in assembler, but with the housekeeping and keyboard/mouse drivers in C.  One of the one-shot timers is used to provide a mouse time-out, so the project will still run even if there’s no mouse connected.

Thanks to code borrowed from klibc, the FrameBuffer’s address is no longer hardcoded, and instead is malloc()ed.  Since there’s no operating system to provide memory blocks to the malloc arena, I’ve added a routine to add a hardcoded block of memory for use by malloc().  The actual bounds of that block are specified by the GCC linker script.  This allows me to hardcode the upper bound to match the hardware, but have the lower bound automatically set immediately above the region occupied by the firmware itself.
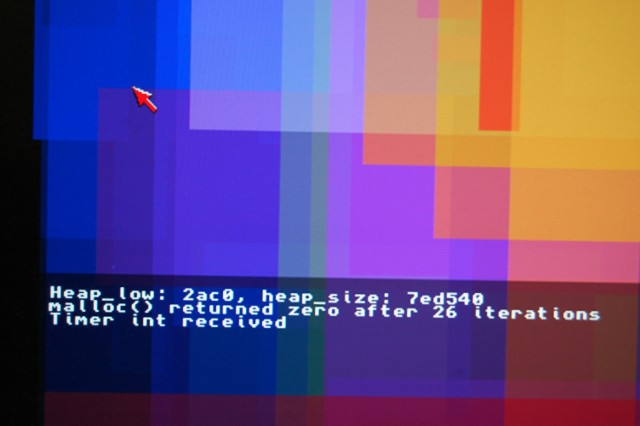
This version has a keyboard driver, too – incomplete but functional enough that what you type ends up on screen.  Mouse buttons are also detected, and will cause the colours to cycle more rapidly.

Full source and binaries can be found here.

Experimenting with TG68

Part 3 – Writing to the framebuffer

The previous instalment of this project saw a working VGA framebuffer being filled by an automated hardware process.  Since then I’ve managed to get the TG68 processor running a program from a blockram-based ROM, and writing to the DE1 board’s SDRAM.

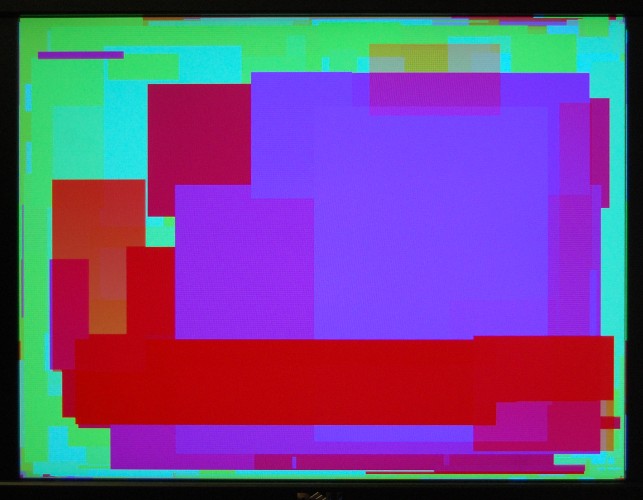
The framebuffer being filled by the TG68.

The memory map for the TG68 looks something like this:

  • $000000: ROM (at the moment the ROM code just runs sequentially from $000008.  Will eventually need to put an interrupt table in place and move the code elsewhere.)
  • $0FFFFA: A couple of variables
  • $100000: The frambuffer
  • $7FFFFE: The initial stack pointer

For the ROM I use an M4K blockram, with initial contents specified with an MIF file.  To create the MIF I first assemble the code with Easy68K, then convert the S-Record file it produces to MIF format using srec_cat, like so:

srec_cat in.S68 -o out.mif -mif 16

The ROM program currently backfills the screen, then draws random rectangles in an incrementing colour.  The display is Hi-Colour (5-6-5) bit, which is dithered to fit the DE1’s 4-bit-per-gun output.

The complete project, for anyone who’s interested, can be found here.

Currently the fill-rate is pretty lousy since only a single 16-bit word can be written per slot.  I need to add a writethrough cache of some kind, preferably one capable of merging successive writes to a single burst.

Possible future plans for the project include:

  • CPU cache – separate instruction and data.  Just one burst (64 bit) initially.
  • Writeback cache – to allow (a) the CPU to continue working while a write is in progress, and (b) to gang sequential writes into a single burst write.
    Sprite controller – just one sprite for mouse pointer.
  • Multiple screenmodes.
    •  8bit
    •  lowres
    •  scandoubled?
    •  PAL?
  • Sprite controller.  Just one sprite, for a mouse pointer.
  • A colourtable for indexed modes
  • VBlank interrupt
  • Interrupts in general
  • SD card interface
  • PS/2 controller
  • Hardware registers for framebuffer address, sprite position, PS2 data, etc.
  • Sound

GameSupport music example

Here’s a little demo program written in AMOSPro demonstrating how to use the “GSTrack Loop” commands from the GameSupport extension.  For this demo I used Yannis Brown’s cover of Tequila Slammer, found on Aminet.  When the program starts up, just the first two patterns in the module will play repeatedly, until you press a key, at which point the rest of the song will play.

As the song plays, the demo will report on any “command 8” events reported by the playroutine.  Command 8 is unused in ProTracker, so it’s a useful method of synchronising program events with the music.

Any time you press the space bar, the program will play a “jingle” (the last pattern of the song, in this case), then pick up where it left off.

If anyone finds this interesting or useful, it can be found here:

Download in ADF format

Download in LHA format

Digging up old projects: GameSupport

GameSupport is an AMOSPro extension I wrote in the dim and distant past to make my life easier when writing AMRWolf and the first prototype of AMRVoxel.  Since I’m about to release the final work-in-progress of AMRWolf with source, I’m releasing the extension too.   (The extension occupies slot 23.  Full source is included)

The interesting functions are Gsiconify(), the GsCodeModule concept (maybe I’ll find some example code modules to upload soon) and the GsTrack protracker playroutine, which supports getting command 8 triggers into the program, and also playing a subsection of a module as a “jingle”. (Think Pinball games, where a single pattern plays in a loop until you launch the ball…)

Download: GameSupport extension

A new retro-computing blog is born!

Welcome to Retro Ramblings, my new retro-computing blog.  This site will serve as an outlet for some old Amiga projects that I uncovered recently after digging out my old machines.  I’ll also post here regarding projects tangentially related, such as FPGA development and the Minimig, C64 and suchlike.

I hope as the site develops you’ll find something of interest!