Experimenting with TG68

Part 7 – The Mouse!

After implementing a pointer-shaped sprite, I naturally just had to bring that sprite under mouse control!  So that’s exactly what I’ve done this time round.

The peripheral controller has expanded somewhat, and now provides three programmable timers, and two PS/2 ports.

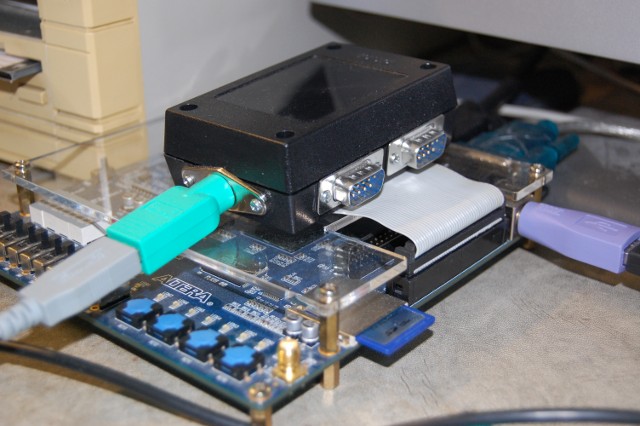
Since the DE1 board only has a single PS/2 socket, I’ve used the second socket that’s part of the Minimig joystick/mouse adapter I posted a few weeks ago.  (The adapter has since taken up residence in a plastic box.)

The PS/2 ports occupy a single word each, at 0x810008 and 0x81000A, respectively, and the arrival of a byte at either port triggers an interrupt.  (The low-level PS/2 communiciation is handled by an open-source component borrowed from the Chameleon hwtest project.)

The timers probably deserve a little bit of explanation too.  They’re very simple – there are four counters, t0 through t3.  There’s a divisor register for all four counters, at 0x810010 through 0x810016, and a control word at 0x81000e which contains interrupt enable bits and status bits for counters t1 through t3.  T0 acts as a prescalar for the other three timers, so with the system clock set to 112.5MHz, setting T0’s divisor to 1125 gives the other three timers a 100KHz base clock.

Another major change this time is that the project no longer launches straight into the graphics test.  Instead it boots into a simple bootrom which listens on the UART at 115,200 baud, 8N1.

Using these settings, it’s possible to user HyperTerminal to upload an S-Record (as produced by Easy68k) into the memory.  The Firmware directory contains a handful of test projects – the most interesting of which is FrameBufferTest.S68.  This is essentially the old graphics test, but with the sprite under PS/2 mouse control.

Full source and binary is, as always, available here for anyone who might be interested.

Experimenting with TG68

Part 6 – a sprite and a simple UART

Now that my VGA controller is up and running and I have a hardware text display too, the next step is to think about adding a mouse pointer.  There are two ways this is traditionally done – one is to draw the mouse with the CPU, saving and replacing the background image where the pointer obliterates it, and the other is to use a hardware sprite.  Since the aim of this project is to learn about FPGAs, going the software route would be a bit of a cop-out!  So the last few days of project time have been spent adding a simple hardware sprite, and associated hardware registers for the TG68 to poke.

The requesting and fetching of sprite data is handled by the VGA Cache (which is gradually morphing into a more general DMA cache), allowing the sprite data to be fetched in the “downtime” between scanlines.  I’m hoping that as this project progresses I’ll be able to keep all the DMA accesses happening in RAM access slot 1, giving the TG68 free rein of slot 2 (wait states due to bank clashes notwithstanding!)

The sprite is currently 16 pixels square, with four bits per pixel in a “1-bit truecolour” arrangement.  Bit 3 indicates opaque/transparent, then bits 2 downto 0 are red, green and blue on/off.  I might change this at some point to a proper paletted arrangement, since that would allow 15 colours (plus transparent) rather than just 8.
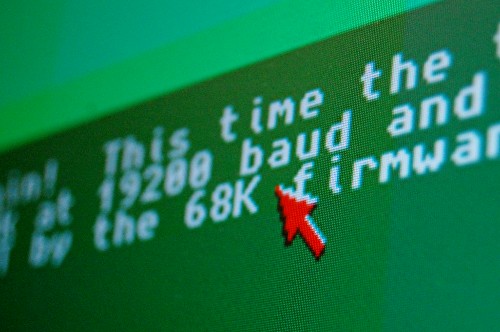
The other interesting addition this time round is a simplistic UART.  There are many UARTs available on OpenCores, some of which are very simple and some of which are very full-featured and complicated.  I picked the simplest one I could find, compiled it and saw a Quartus build log full of warnings about latches.  I then decided that since this is a learning exercise, I’d write my own simple UART from scratch.

In the process I did learn one very important lesson, which is that it’s not safe to make a state machine switch states based on an asynchronous signal, such as the rxd line from an RS232 serial port.

The problem is that, while a construct such as

if rxd='0' then
  rxstate<=start;
end if

looks to a programmer’s eye as though it should trigger an atomic operation in response to a low level on rxd, that’s not how it works in practice.  Instead, in an FPGA, leaving one state and entering another can be quite distinct operations, and if they’re triggered by an asynchronous signal that happens to change too close to a clock edge, it’s possible for one to happen without the other!  This leaves the state machine in an illegal state, and usually stalls it.

The solution is very simple – simply delay the rxd signal by one clock, through a register:

if rising_edge(clk)
  rxd_sync <= rxd;
end if;

As simple as that.  rxd_sync is guaranteed to show the same state at a rising clock edge even if sampled through different paths, so using that instead of the raw rxd signal results in working state machines.

[Edit: It’s not actually as simple as that.  When a signal changes too close to a clock edge it can set up an oscillation (metastability) in the target register which can last for an indeterminate amount of time.  It’s possible, though rare, for that amount of time to be longer than a single clock cycle, so to minimise the chances of it causing problems we delay the signal through two synchronisation registers, which effectively squares the tiny probability of a metastable signal wedging the state machine.  It still doesn’t eliminate the problem entirely, but makes it so vanishingly unlikely that unless we’re building something that controls a car, a life-support machine or a spaceship, we can safely ignore it.]

The UART currently runs at 19,200 baud, 1 start bit, 1 stop bit and no parity.  Characters received are echoed to the screen via the character RAM, and also sent back through the UART, so if you use HyperTerminal you’ll see what you’re typing.

The ultimate goal here is to be able to bootstrap the system over the serial port, uploading program code to be executed.  This will avoid having to recompile the entire project every time the code changes.

One other minor change this time round: the master clock frequency has been increased from 100Mhz to 112.5 Mhz.  In the process I’ve added some timing constraints to the SDRAM interface and made a few other tweaks which were necessary to make it stable at that speed.

Full source and binary for anyone who might be interested, available here.

Experimenting with TG68

Part 5 – Interrupts and other tweaks

Since my last post I’ve made a few structural changes to the project, most notably to the video controller.  Rather than just being a collection of ad-hoc lines in the toplevel file, I’ve moved it into a self-contained module and also moved the vgacache out of the SDRAM controller and into this new video_controller module.

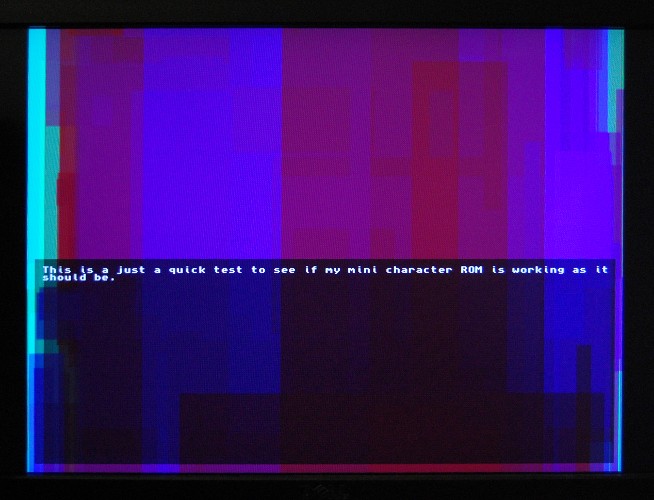
As yet another learning exercise, I’ve also added a simple character ROM (character definitions taken from the Minimig boot code), and text buffer, which is merged with the display.  This will no doubt provide a useful debugging display as the project progresses!

The new video_controller module will eventually support a certain amount of runtime adjustment to the video, through some registers exposed to the TG68 processor.  Currently only 1 32-bit register is implemented, which is the framebuffer address.  This means the processor can now scroll the display vertically.

In order to do this smoothly, the framebuffer pointer must be updated during the vertical blanking interval – and the best way to do that is to use a VBLANK interrupt.  Therefore I’ve also created a simple interrupt controller.  This detects momentary pulses on seven different interrupt lines, and encodes them into the 3-bit IPL signal used by the TG68 processor.  I’ve used interrupt level 1 for the VBLANK interrupt, and left the others unused for now.  When I come to add keyboard and mouse support, another interrupt will be used to signal that a byte of PS/2 data is ready.

Binary (.sof file) and full source for anyone who might be interested, can be found here.

Experimenting with TG68

Part 4 – improving memory performance

Since the last instalment I’ve slightly modified the program run by the TG68, so that instead of simply filling a rectangle with the current colour it mixes it with the colour already there.  Quite apart from looking prettier on-screen, this increases the demands on memory access, making for a better testbed for the next stage of the project: caches.

In the current design, when the TG68 wants to access memory, a request signal is raised.  Depending on which part of the SDRAM cycle this happens, it can be up to 15 cycles before the controller notices the request, and if the bus is busy it can be 16 cycles more before the request is serviced.  Since the processor’s waiting around for this to happen, it makes sense to add a temporary buffer into which a pending write can be placed, so the processor can carry on working.  Better yet, since the SDRAM cycle’s already set up for 4-word bursts, if the processor tries to write to an address that will be written during the burst, we can gang the writes up and perform them as one operation.

Likewise, when reading we’re getting four-word bursts from the SDRAM controller, so it makes sense to store all four words, which lets us respond immediately if the processor then asks for another word from the same burst.

There are a couple of complications we have to take care of.  Firstly, when writing the processor uses two signals to indicate which of the high and low bytes of the word should be written.  This allows byte writes even though the bus is 16-bits wide.  The write cache has to store these signals alongside the data to be written.

The other complication, which I haven’t yet attended to, since it doesn’t affect this test project, is that with both read and write caches in use, it’s possible for the read cache to contain stale data.  To fix this, I just need to mark the read cache as dirty if it holds data from an address that’s being written to.

The code, as always, for anyone who might be interested, can be downloaded here.